

How To Run Remote Triage Collections on Quarantined Endpoints
By Doug Metz, Senior Security Forensics Specialist
Enterprise customers running Microsoft Defender for Endpoint have a lot of capabilities at their fingertips. This includes the Live Response console, a limited command shell to interact with managed Defender assets online. From across the network an analyst can connect to an endpoint and pull back specific evidence to support incident response investigations. Besides its native commands, you can also use the console to push scripts and executables to endpoints. One benefit of using the Defender console is collecting remote triage collections from endpoints is possible even with systems that are isolated from the corporate network due to malware infection or malicious activity.
Using the Live Response console, you can push Magnet RESPONSE (a free IR data collection tool for members of the forensic community – download the latest version here) to a Windows endpoint, run a triage collection, and pull that collection back for analysis via the console. Because we are operating strictly in the Live Response console, this process will work for devices quarantined as well, with limited connectivity to Defender. We’ll get to one caveat in just a bit.
Setup
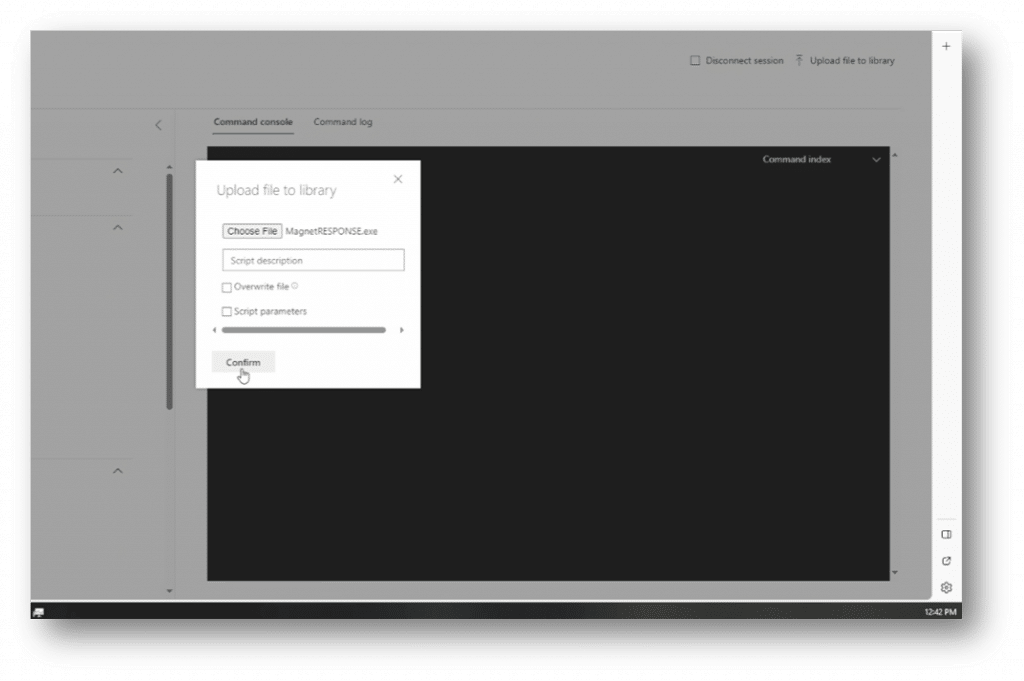
First, we’ll upload MagnetRESPONSE.exe and Defender_RESPONSE.ps1 to the Live Response Library.
Note: there is a specific security setting in the Defender console if you want to allow unsigned scripts. The location is in Security -> Settings -> Endpoints -> Advanced Features

Use the UPLOAD button on the top right and browse where you’ve stored MagnetRESPONSE.exe and Defender_RESPONSE.ps1.
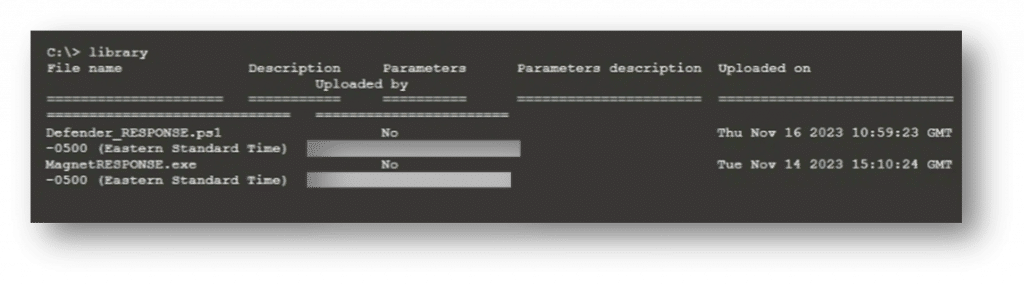
You can verify that the files are available by using the library command. Any files uploaded to the library will persist, so you won’t need to upload the files each time.
Once you’ve connected to the endpoint, there are two commands to run at the console.
put MAGNETRESPONSE.exe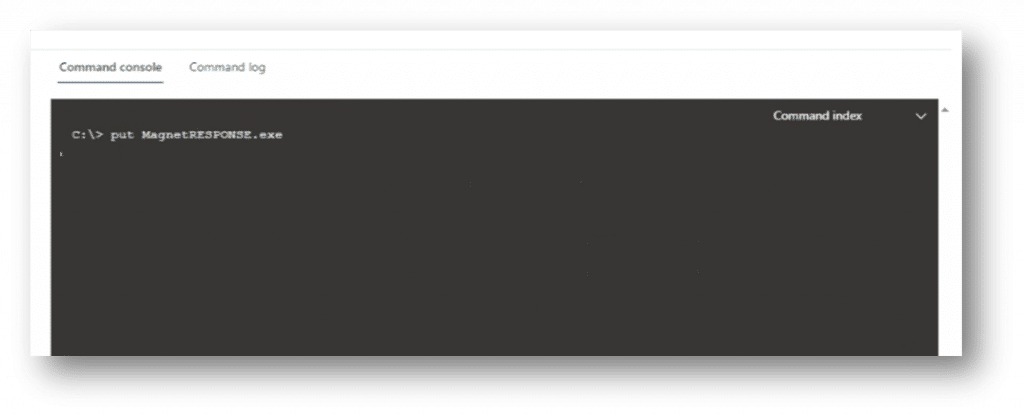
This will push the Magnet RESPONSE executable to the endpoint at the location:
C:\ProgramData\Microsoft\Windows Defender Advanced Threat Protection\Downloads\MagnetRESPONSE.exeThe second command will run the PowerShell script on the endpoint.
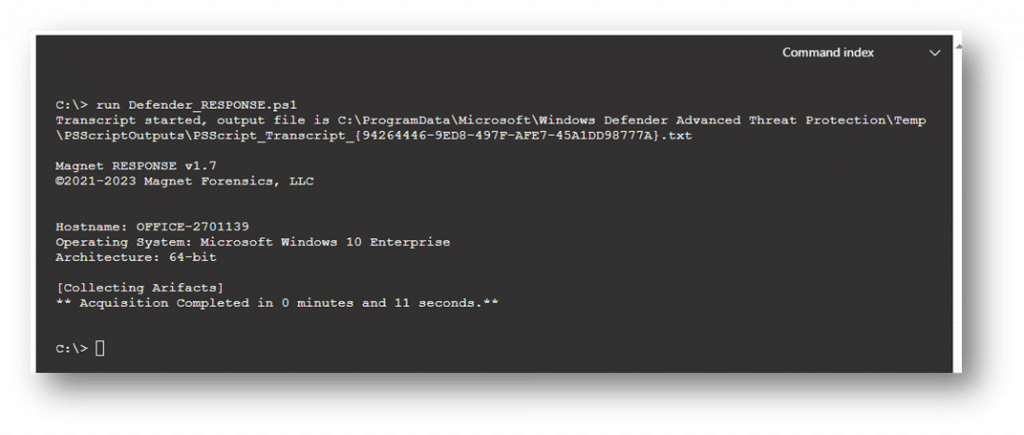
Run Defender_RESPONSE.ps1
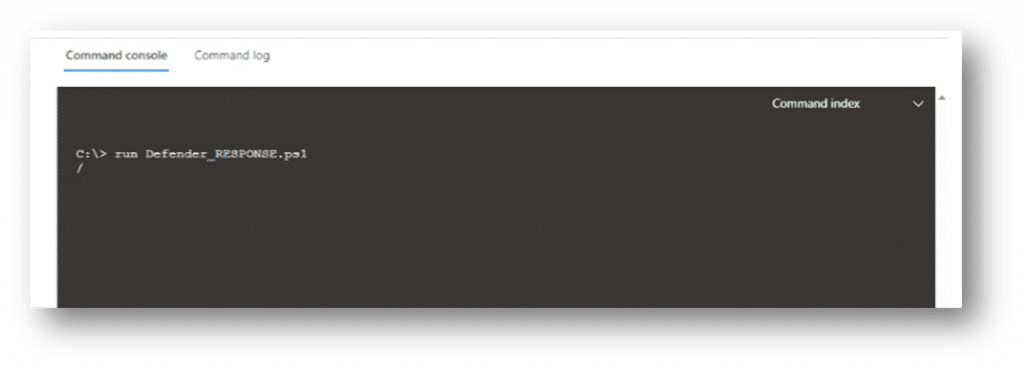
Once the collection has completed you should see output like the screenshot below. Note, the console will not display any information until the collection process has completed. You can also put an “&” at the end of the command (run Defender_RESPONSE.ps1 &) to force the collection to the background and return you to the prompt so you can keep working with Live Response if needed.
Retrieving the Data
Once the script finishes, the zipped output will be saved to “C:\Temp\RESPONSE” on the remote machine.
- Navigate to the output folder using the command — cd c:\Temp\RESPONSE
- List files using the “dir” command
- Copy the zip filename
- Download <filename.zip>
The download command will copy the zip file to your workstation, where you can ingest the contents into your analysis tools like AXIOM Cyber (see the section “Processing and Analyzing with AXIOM Cyber” below for more details.)
Note: The Defender console only allows for the transfer of files under 3GB. If the collection exceeds that size, you’ll need to use another means to transfer the collection from the endpoint. If this machine is quarantined, you’ll need another method for more extensive collections. You can use a tool like Ginsu to repackage larger collections into 3GB segments if the console is your only access method to the device.
Capturing Memory with Magnet RESPONSE
Any of the available command line options for Magnet RESPONSE can be utilized to customize your collection. By default, the script will capture Volatile Data and a triage collection, (denoted as System Files within Magnet RESPONSE). You can also include a RAM capture as part of your collection. To do so, simply add /captureram to the line where the collection parameters are defined before you upload the script to Defender.
./MagnetRESPONSE.exe /accepteula /unattended /output:C:\temp\RESPONSE /caseref:DefenderRESPONSE /capturevolatile /capturesystemfiles /captureramIncluding memory will increase the size of the collection. If this is a quarantined endpoint and you are limited to using Defender to pull back the files, you’ll need to repackage the files with Ginsu to ensure all the files are within the 3GB transfer limit. 3GB is the maximum file size that can be transferred. If you’re experiencing timeouts or errors when trying to get the files, it may be worthwhile to try a smaller package size (2GB, 500MB, etc.) This will produce more files, but of smaller sizes. As with all incident response and forensics tools, it’s best to test this in your environment ahead of time so that at the time of a real incident you aren’t wasting time troubleshooting connection issues.
Writing Data Direct to a Network Location
Everything in the process above should work with a quarantined asset. Essentially this means the asset can only talk to Defender and nothing else. If the asset is not yet quarantined, or may not need to be, you can also have the output written directly to a network share. This removes any need to resize the files before transfer but would only be applicable for non-isolated endpoints. To change the output destination, simply change
./MagnetRESPONSE.exe /accepteula /unattended /output:C:\temp\RESPONSE /caseref:DefenderRESPONSE /capturevolatile /capturesystemfilesto
./MagnetRESPONSE.exe /accepteula /unattended /output:\\Server\Share /caseref:DefenderRESPONSE /capturevolatile /capturesystemfilesreplacing \\Server\Share with the appropriate network location.
When the collection completes, rather than use the ‘get’ operation within Defender, the analyst can retrieve the files from the network location.
You can copy the script below, or download a copy from GitHub.
Defender_RESPONSE.ps1
<#
.NOTES
Defender_RESPONSE.ps1
doug.metz@magnetforensics.com
v1.1

.SYNOPSIS
This script can be used to leverage Magnet RESPONSE and the Microsoft Defender Live Response console to capture triage collections on remote endpoints.

Prerequisites:
- Defender Live Response Console - upload MagnetRESPONSE.exe to the Library
- Defender Live Response Console - upload Defender_RESPONSE.ps1 to the Library

Operation:
1. 'connect' to endpoint in Live Response // establish connection with the endpoint
2. 'put MagnetRESPONSE.exe' // copies the exe to the target system
3. 'run Defender_RESPONSE.ps1' // where the magic happens

Retrieving the Data:

    Once the script has finished running, the zipped output will be saved at the location “C:\Temp\RESPONSE” on the remote machine.

    *   Navigate to output folder using command — cd c:\Temp\RESPONSE
    *   List files using “dir” command
    *   Copy the zip filename <filename.zip>
    *   After the output filename is copied, collect the output by downloading it from the remote machine to your local system using the “Download” command. Download <filename.zip> &

#>
Write-Host ""
Write-Host  "Magnet RESPONSE v1.7
$([char]0x00A9)2021-2023 Magnet Forensics, LLC
"
$OS = $(((gcim Win32_OperatingSystem -ComputerName $server.Name).Name).split('|')[0])
$arch = (get-wmiobject win32_operatingsystem).osarchitecture
$name = (get-wmiobject win32_operatingsystem).csname
$stopwatch = [System.Diagnostics.Stopwatch]::StartNew()
Write-host  "
Hostname: $name
Operating System: $OS
Architecture: $arch
"
./MagnetRESPONSE.exe /accepteula /unattended /output:C:\temp\RESPONSE /caseref:DefenderRESPONSE /capturevolatile /capturesystemfiles
Write-Host  "[Collecting Arifacts]"
Wait-Process -name "MagnetRESPONSE"
$null = $stopwatch.Elapsed
$Minutes = $StopWatch.Elapsed.Minutes
$Seconds = $StopWatch.Elapsed.Seconds
Write-Host  "** Acquisition Completed in $Minutes minutes and $Seconds seconds.**"
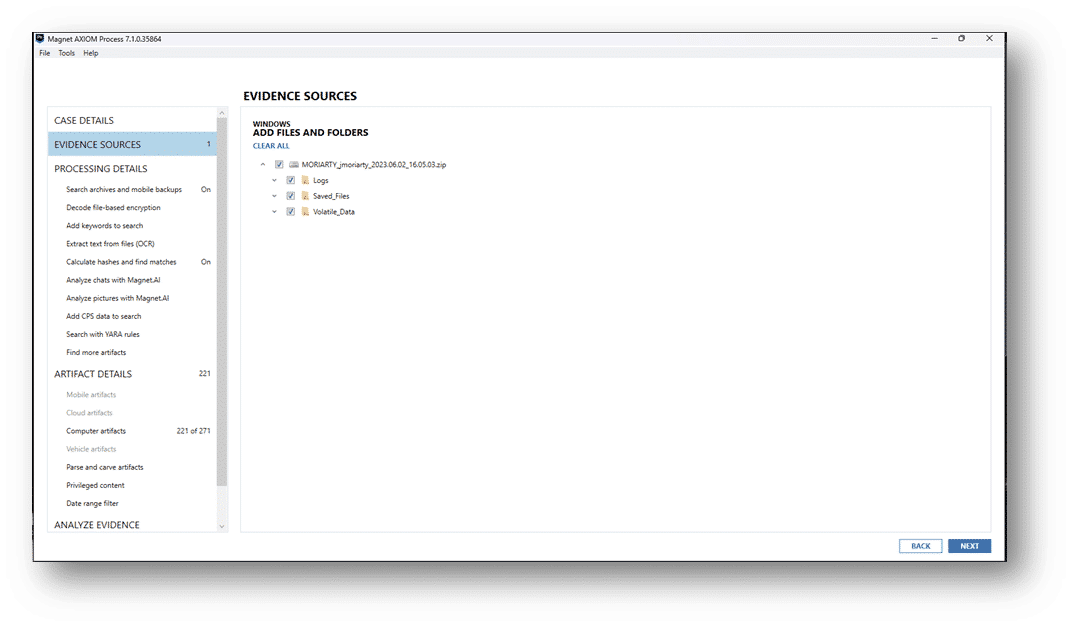
Processing and Analyzing with Magnet AXIOM Cyber
Magnet AXIOM Cyber is a robust yet intuitive digital forensics solution that enables you to unravel and understand cyber threats efficiently. AXIOM Cyber easily supports the processing of Magnet RESPONSE output collections.
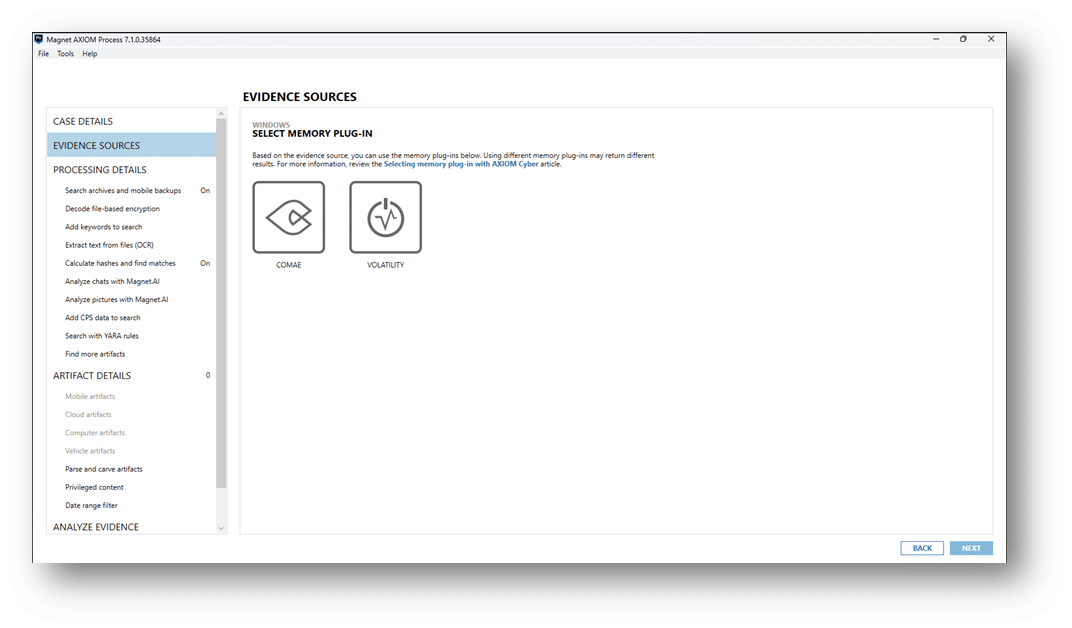
Magnet RESPONSE will collect memory by default using MAGNET DumpIt For Windows. If the collection attempt fails, Magnet RESPONSE will use MAGNET RAM Capture. You can process either format within AXIOM Cyber. For DumpIt For Windows collections, you can process using Comae or Volatility.
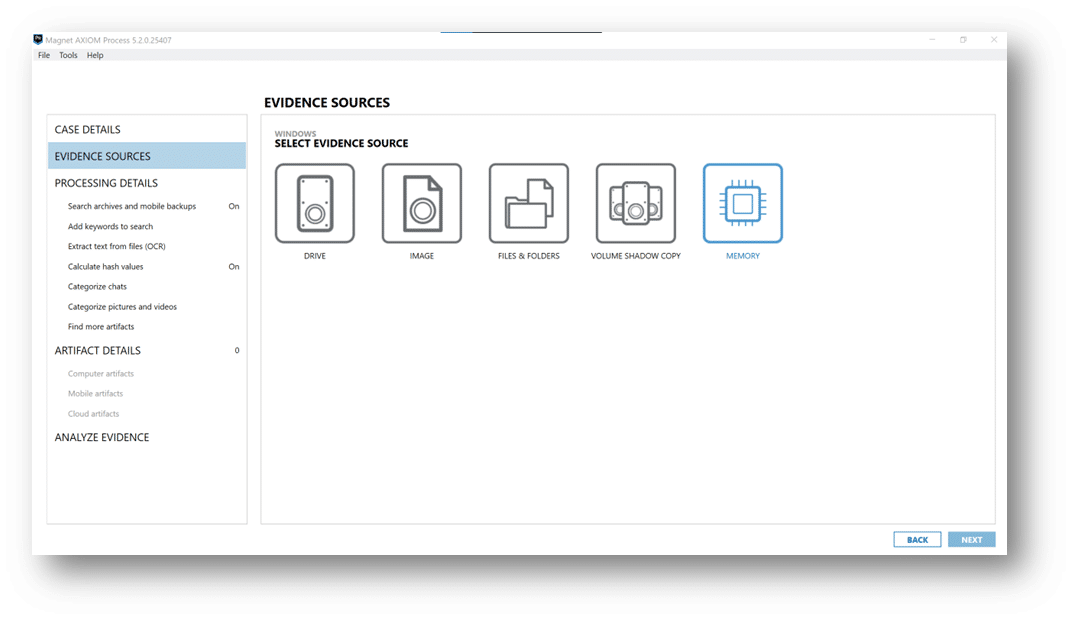
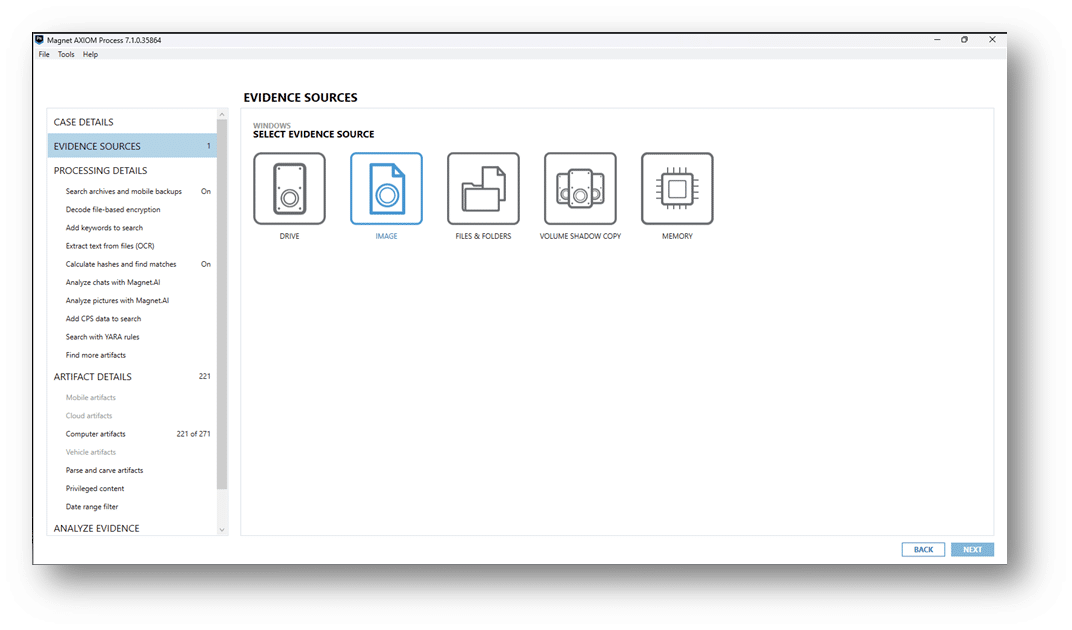
For all the other collected data, point AXIOM Cyber to the zip file as an Image. If you’ve used Ginsu to repackage the files, just point to the first zip file and AXIOM Cyber will handle the multi-part zip format automatically.
Download Magnet RESPONSE Now
Magnet RESPONSE is free for members of the forensics community. Visit our Free Tools page to download your copy of RESPONSE today!
Additional Resources
- Speed is essential when investigating a cyber incident. Learn how our DFIR solutions can help enhance your incident response playbooks in this blog post.
Have you tried Magnet AXIOM Cyber yet? Get your free trial now and see how AXIOM Cyber helps you quickly uncover the truth by getting you the evidence you need to safeguard your business.